 |
Matthew's Portfolio
|


|
|
Matthew's Portfolio
|
|
In the second week of the final project, we got our first taste for using the encoders in our hardware kit.
Using the method derived in class, we wrote an encoder class (seen in encoder.encoder.py) that implemented an algorithm to prevent overflow and underflow as the motor shaft was spun. For the first week, the motors weren't powered, and the shafts were handspun to test the implementation. More commands were added to our front end, such as a 'p' to get the position, 'd' to get the delta in ticks, 'v' to get the velocity, and 'z' to zero the encoder. By spinning the encoder with one hand and pressing key commands with the other, the system could be tested to ensure that the keyboard commands correctly sent information to the Spyder Console window for printing.
Code for this part of the project has since been written over, but their final forms can be viewed at the following files.
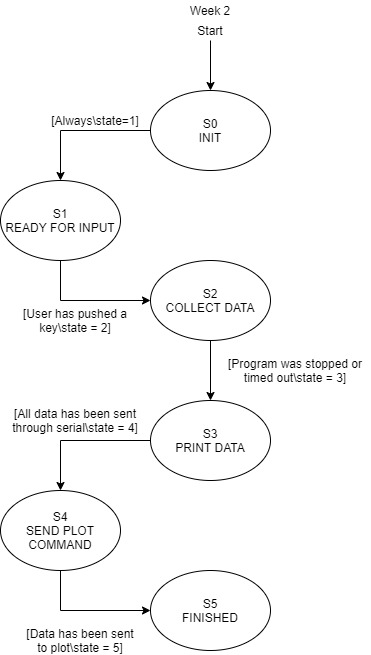
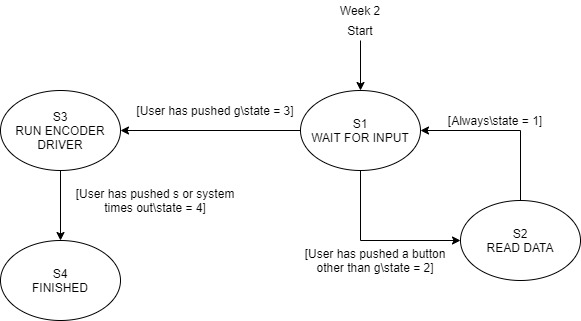
Below is a summary of the state diagrams utilized for the week. These stayed fairly consistent between weeks (the overall flow stayed the same, we were just exporting/sending more data with each week).